Crack in base of Wista 45N

M

MPP-MicroPress

Guest
Hi all

I am due to be going to the Lake District in a couple of weeks, and I will be taking my Wista 45N with me, which I am looking forward to using.

Long story short, I was setting up my tripod and camera last night to practice my set up procedure, as I have not used the camera for a while due to life getting in the way. Whilst putting the camera on the tripod, it somehow didn’t connect to the tripod head and fell off onto the floor.

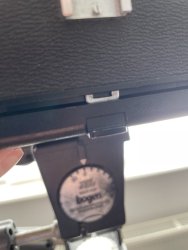
The camera now doesn’t lock into the correct position when it is being set up (I.e the 90 degree position),it needs persuading to lock when it is being put away and most of all, there is a crack in the base of the camera itself.there is no other damage, the focusing screen is fine, the lens is fine, no rips in the bellows.

I think the locking issue can be fixed as the arms just need to be adjusted on inspection. However I am concerned about the crack. The entire camera moves slightly and I can see movement in the crack itself. I am sure that when the locking issue is fixed, the crack won’t affect the use of the camera at all.

I could probably sell some unused 35mm gear off to fund a replacement camera, but is it worth a repair, or should I buy a replacement?I am not sure if the crack would really effect the use of the camera once the other damage is repaired?

thank you all
 

Attachments

  • image.jpg
    image.jpg
    112 KB · Views: 27
  • image.jpg
    image.jpg
    110.2 KB · Views: 27
  • image.jpg
    image.jpg
    65.7 KB · Views: 27
UPDATE - There is a crack on other side of the camera as well - so that’s two hairline cracks on the base of the camera, on both sides…
 

Attachments

  • image.jpg
    image.jpg
    126.8 KB · Views: 17
Bad luck, I'm not sure on a fix for those crack, I'll ask a friend who is an engineer.

Ian
 
Bad luck, I'm not sure on a fix for those crack, I'll ask a friend who is an engineer.

Ian
Many thanks, Ian. I may just continue to use it until it breaks. It seems to function ok, it may last a while yet… I have done some research and others have suggested welding it or using locktite glue.
 
I think there's a newer glue slightly stronger than Loctite, but either may well be a permanent fix used carefully.

Ian
 
You’d also need to do some very careful clamping before applying the glue. It might be possible to attach metal strips as reinforcements if this is aesthetically acceptable and doesn’t impede operation.
 
I would get a welder to look at it. If the alloy can be welded without causing any distortion that is what I would go for. Other than welding an alternative choice

You’d also need to do some very careful clamping before applying the glue. It might be possible to attach metal strips as reinforcements if this is aesthetically acceptable and doesn’t impede operation.


would be to use metal stitches and the correct glue.
 
If it were mine, I’d remove as much of the camera components as possible from around the cracked parts, then very carefully press the damaged parts back into alignment. After that, I’d have clamps at the ready and rehearse how to apply them. Finally, I’d apply the superglue of choice to the crack, make sure it had penetrated and apply the clamps, quickly and firmly but not too tightly.
One crack at a time seems to be advisable. As you’ll be handling a complicated object, surgical gloves might save you from forming a lifelong bond with your camera.
I should say that I’m merely a pragmatic bodger, not an engineer and there may be better methods, better materials and much better advice available.
The best solution would be a spare part. Ebay, perhaps?
 
I wouldn't use superglue. It sometimes sticks and sometimes doesn't. And when it doesn't you don't get a second chance, because it doesn't stick to itself. If the broken part is metal, a better glue would be two part epoxy. Slow setting is stronger but quick setting would allow you to hold the two parts together until the glue has gone off. That way you won't need clamps - which in any case could be hard to apply.
 
I know there would be better advice available. My reason for suggesting superglue was that the camera is not (as far as I can see) broken into pieces, but cracked. Superglue has a low viscosity and can penetrate a crack whereas all the epoxies I've seem are quite thick stiff cells or pastes when mixed. But you are certainly right that sometimes superglue doesn't behave as expected. Someone here may have better advice on the choice of whatever adhesive is used.
For myself, I'd be very doubtful about holding the parts of precision equipment by hand for the several minutes it takes for the rapid epoxies to compete their first set. You may well have a firmer grasp and steadier hands than me.
 
David, I agree with your point about superglue being easier than epoxy to apply a crack that can't be pulled very far apart. The problem is that when too much superglue floods into a joint, it rarely seems to stick. Epoxy, if you can get it in, will stick every time. And it is gap filling, so the two halves of the joint don't have to be pressed really hard together, merely held in alignment.
 
Like mentioned above, if it was mine, I would strip it down as far as you can, then using a dremel I would make a channel in the cracks about 2mm in if you can, depends on the thickness. I would then cut out a dog bone shape across the cracks as deep as you can go. Then see if you can prise the cracks open and apply epoxy in to the crack and leave to dry, try to clamp the crack.

Then when thats dry I would fill the dog bone shape with liquid metal or metal putty to help to keep it rigid. I certainly would not discard the camera just for that, it just needs some time and patience on it. Just my view.
 
My thoughts would be to Drill a 2mm hole diagonally across the crack. Part fill with epoxy resin and tap a stainless steel dowel in. Small diameter dowels are not that hard to find.
Cheers
Diz
 
There are glues for issues like this, Loctite make all sorts of glues, some specifically for metals. You need an engineer with experience in repairs :D It could be quite simple but as David says it wants clamping in the right positions first.

Ian
 
Yes, if you’re happy with cutting into the metal, you could use some reinforcement. After getting the parts back into place and clamping them in place, cut a groove across the crack, deep enough to contain a metal rod. Something like a Dremel would do this. Brass rod is available from model shops. You could have a dog bone shape or simply taper the groove slightly outwards into a slight bow-tie shape. Clean the insert thoroughly and roughen or notch the surface. Warm the whole thing to reduce the viscosity of the resin and help penetration. Half-fill the groove with epoxy and submerge the insert, without touching it with your greasy fingers. Use a cocktail stick to push it under and burst any bubbles. Make sure the metal is covered covered and the resin stands a little proud. Put the whole thing somewhere quite warm to go off. When the resin is firm but not hard, trim off the excess with a scalpel.
You’ll have to do this with the workpiece facing upward and being level, so it’s probably one at a time, although it might be possible to do a row of these stitches along the crack, all at the same time.

For the moment, duct tape might work, but you’d have to clean up if you want to do more permanent repairs.

Are we perhaps telling you more than you want to know?
 
I'm not sure that we should be giving very detailed advice about how to tackle this problem without actually being able to examine the camera. Drilling a hole across the crack and inserting a metal pin could work well, but only if the crack is deep. Fitting a butterfly strip across the crack could work well, but only if the crack was shallow. You really need the camera in your hand before you can work out the best approach.
 
If metal got cracks one have to drill holes to the end of the cracks which will avoid further ripping.
So this would be my first act - finding and drilling the crack's ends.
 
Back
Top